Hotspot block
An image with clickable pins on it, in the new builder. Each pin opens a small tip with its own content, so learners explore an image piece by piece.
What is the Hotspot block and when would I use it?
The Hotspot block is a new builder block where you place an image, drop clickable pins on it, and give each pin its own tip. When a learner taps a pin, its tip opens over the image with the content you added to that pin. Each pin counts as one step in the screen, so a learner's progress reflects how much of the image they have actually worked through.
Classic courses use the Hotspot screen instead, and those screens keep working as they do today.
It is useful whenever the learner needs to work through the parts of a single visual rather than read a list of them. Common cases:
- Labelled diagrams, for example the parts of a piece of equipment, the layout of a workspace, the sections of a dashboard.
- Interactive images where a photograph or illustration has several things worth explaining and you'd rather surface them on demand than crowd them into captions.
- Guided walkthroughs of a screenshot, so a learner clicks through the buttons or fields in the order that makes sense.
How do I add and configure a Hotspot block?
- In the new builder, add a new screen or open an existing one, then add the Hotspot block from the Add block menu. If you'd rather start from a ready-made layout, the Screens picker also has a Hotspot layout under Interactive, with the image running the full width of the screen and space for a title above it.
- Upload or choose the image you want to place pins on. A landscape image works best, so learners don't have to scroll to see every pin.
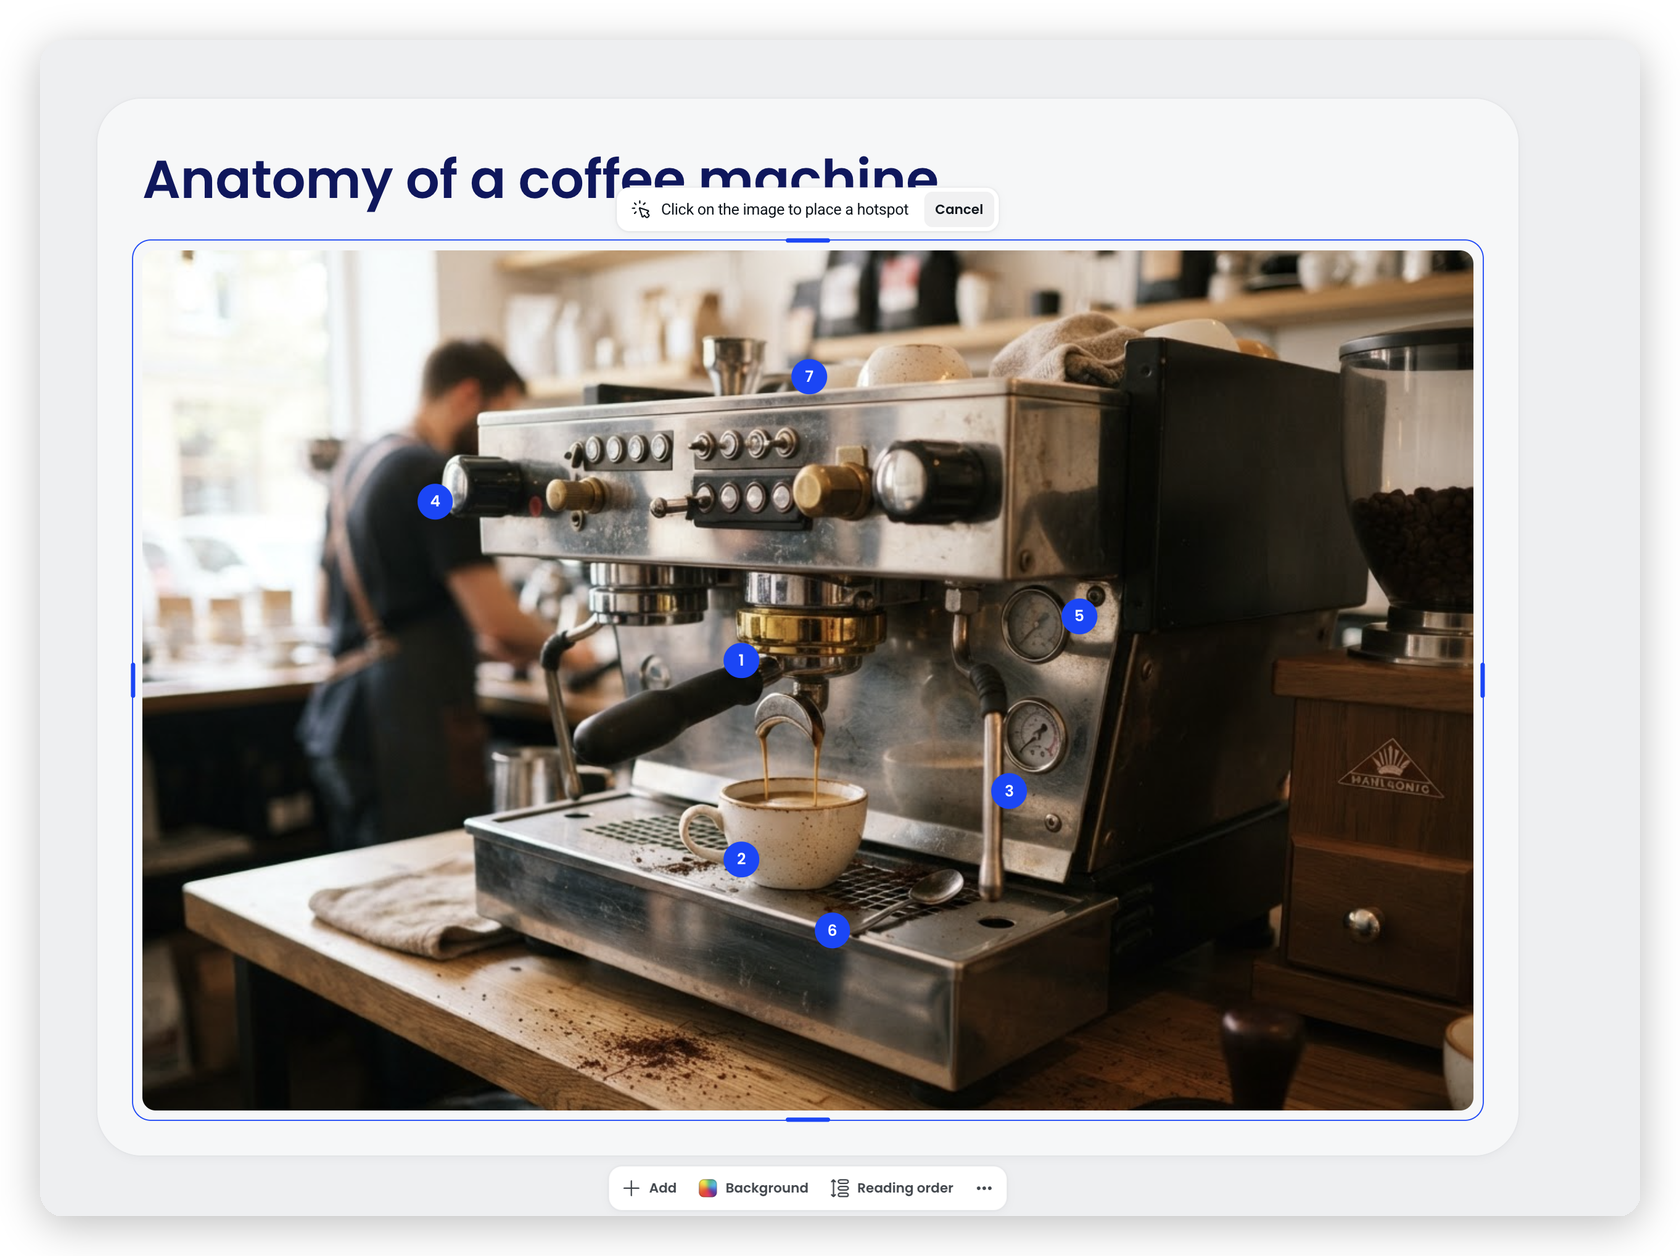
- Select the block, then click + Add hotspot in the toolbar above the image. A prompt appears at the top of the builder asking you to click on the image to place the hotspot. Click anywhere on the picture to drop the pin, or Cancel to back out.
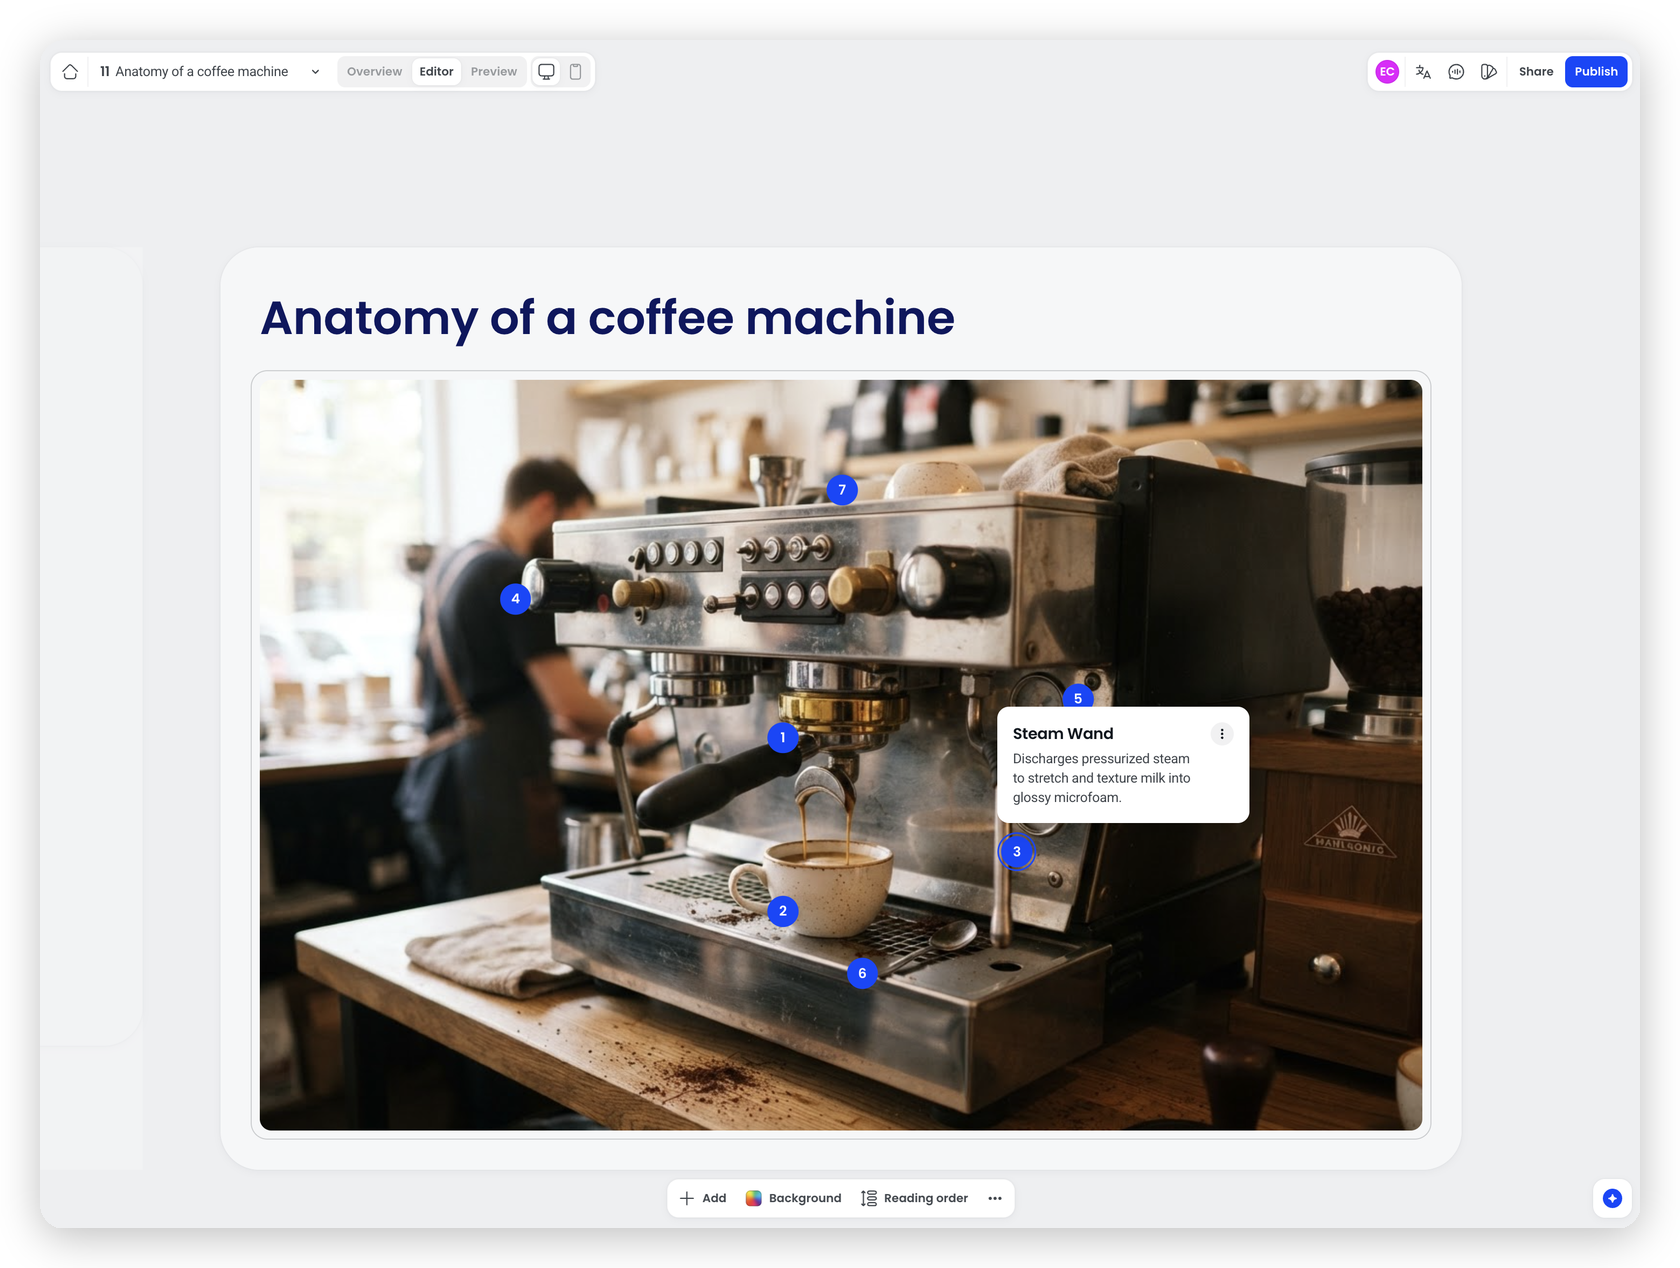
- With the pin selected, add its tip content: a bold title and a paragraph description. Each pin's info card also carries an overflow menu (…) for further actions. Repeat for each pin you want on the image.
- Drag any pin to reposition it, or delete it from the pin's own controls.
- Preview the screen to check that every pin is where you want it and every tip reads the way you want.
Pins are read and numbered in the order you add them, so add them in the order you want learners to go through them.
What's in the hotspot toolbar?
With a hotspot selected, a contextual toolbar sits above the image with:
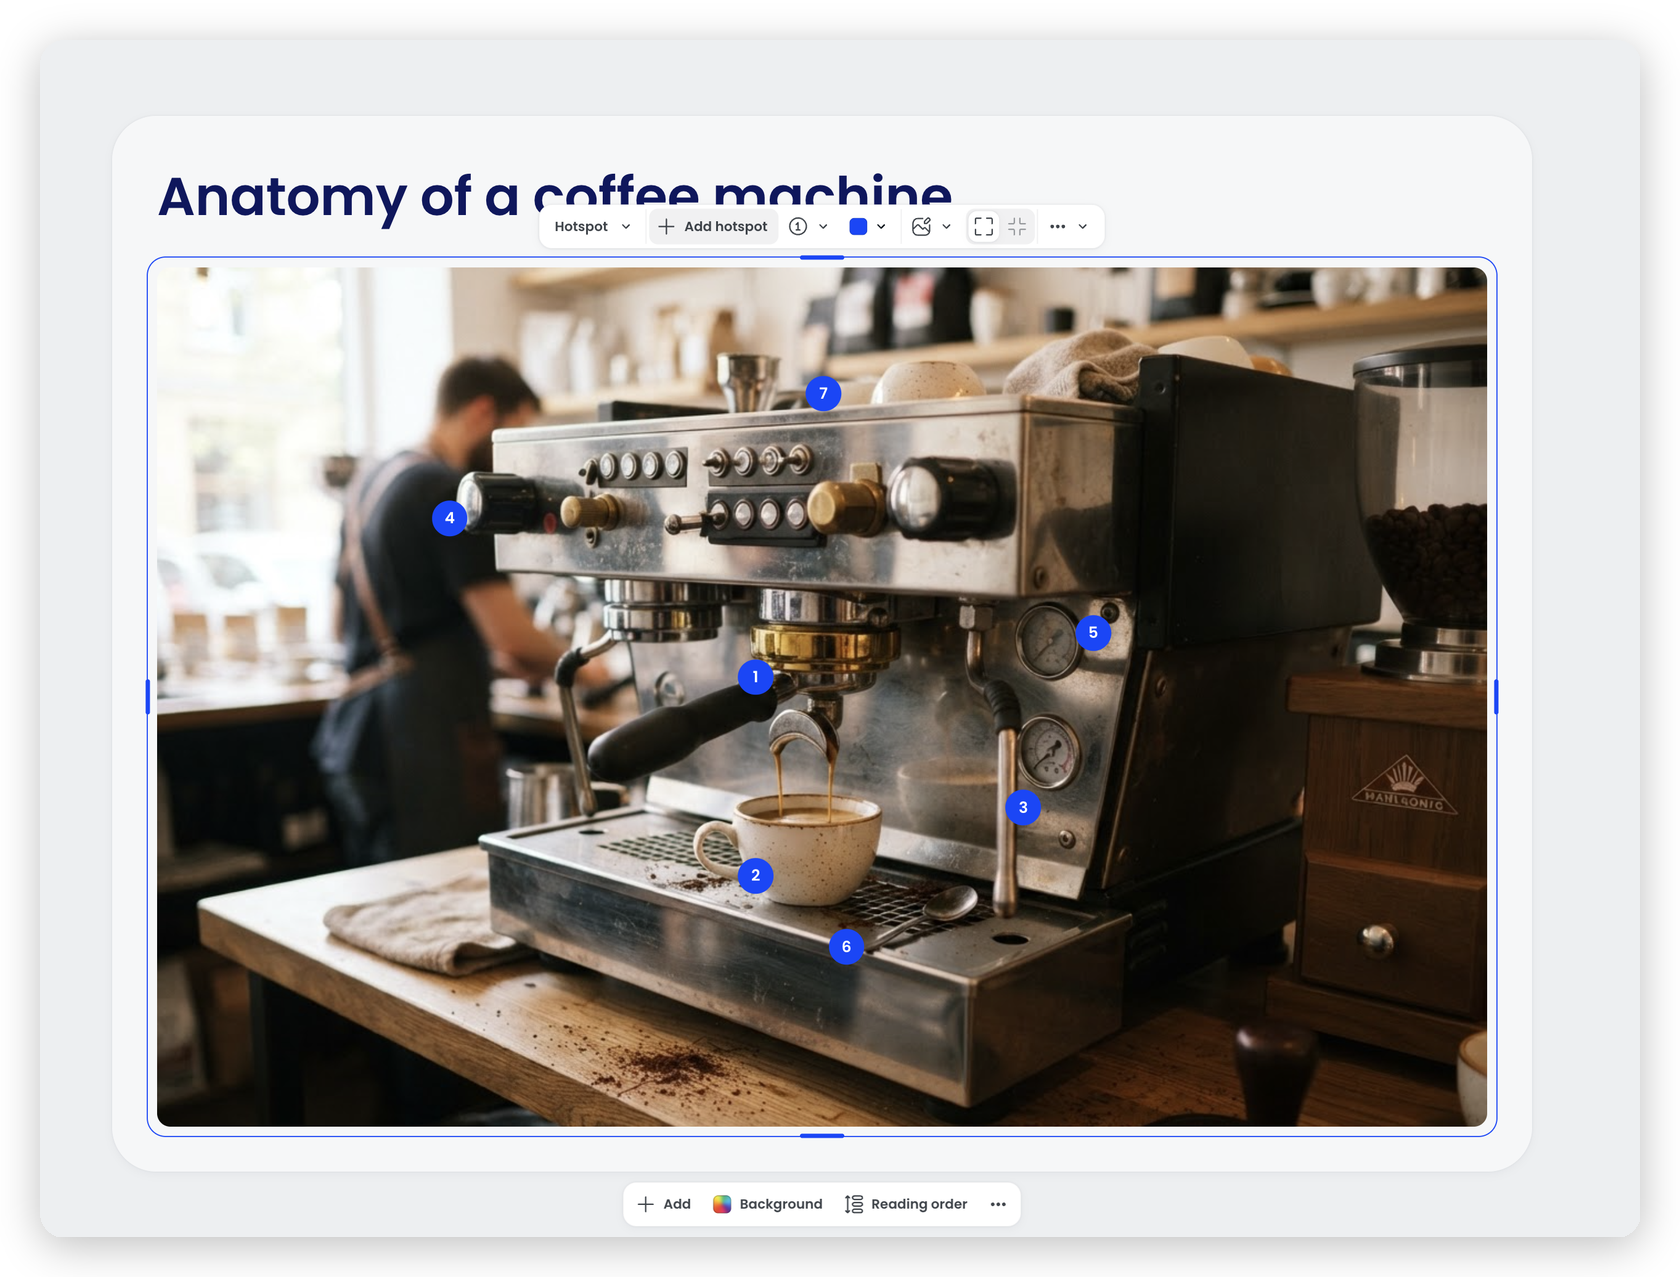
- Icon style, to show each pin as a plus or a number.
- + Add hotspot, to start placement mode for a new pin.
- Marker colour, for the pins' colour. It comes from your course branding and can be customised.
- Fit or Fill, for how the image sits inside the block. Fit shows the whole picture; Fill scales the image to fill the block.
The screen-level Reading order option sets the order of the blocks on the screen. It doesn't reorder the pins inside a Hotspot block.
How do I fit the image?
Set the image to Fit so the whole picture is visible inside the block. When the image doesn't fill the block on its own, a blurred version of it fills the space behind. Pins are anchored to the image, so they stay on the parts of the picture you placed them on.
Place pins slightly inside the edges of the image rather than right on them, so they still sit inside the picture at narrow viewport widths.
Can I add narration?
If narration is turned on for the course, each hotspot tip can be narrated. With narration autoplay on, the tips open and read out in the order the pins were added, and the pin whose tip is currently open shows a visible open state. Once every tip has been read, the pins update to show the screen is complete and the forward navigation appears, so the learner can move on.
What does a learner see?
The learner sees the image with the pins on it. Tapping a pin opens its tip over the image; tapping again, or tapping outside the tip, closes it. The pin whose tip is currently open shows a distinct state, so it is clear which one the learner is looking at.
On mobile, the course navigation stays visible while a tip is open, so a learner can always tell where they are in the course. The image resizes to fit the narrower viewport, so pins stay inside the picture instead of being cropped off at the edges.
If narration autoplay is on, tips open in order automatically as their narration plays, on both desktop and mobile.
Frequently asked questions
How many hotspots can I add to one image?
There is no fixed limit set by the block. Keep it to a number the learner can reasonably work through on the screen size they'll be using. On a phone, a dozen pins crowded onto a small image is harder than the same content split across two screens.
Can I change the order the pins are read in?
Pins are read in the order you add them, and there's no control to reorder them afterwards. To change the order, delete pins and add them again in the order you want.
Can I use the Hotspot block on mobile?
Yes. The image resizes to the narrower viewport and pins stay anchored to the parts of the image they were placed on. Place pins slightly inside the edges of the image so they still sit inside the picture at narrow widths.
Does the Hotspot block support narration?
Yes. Turn narration on for the course to narrate each tip, and turn autoplay on if you want the tips to read out in order. With enforced narration, forward navigation appears only once every tip has been read.